How to Make Salmon Nigiri at Home – Easy Step-by-Step Recipe
Introduction
If you love sushi, you know there’s something special about salmon nigiri. The delicate balance of fresh, buttery salmon atop perfectly seasoned rice creates a bite-sized masterpiece. The good news? You don’t have to visit a sushi restaurant to enjoy this delicacy. Making salmon nigiri at home is easier than you think, and with the right techniques, you can create restaurant-quality sushi in your own kitchen. This guide will walk you through everything you need to know, from selecting the best ingredients to mastering the art of nigiri preparation.
Table of Contents
What is Salmon Nigiri?
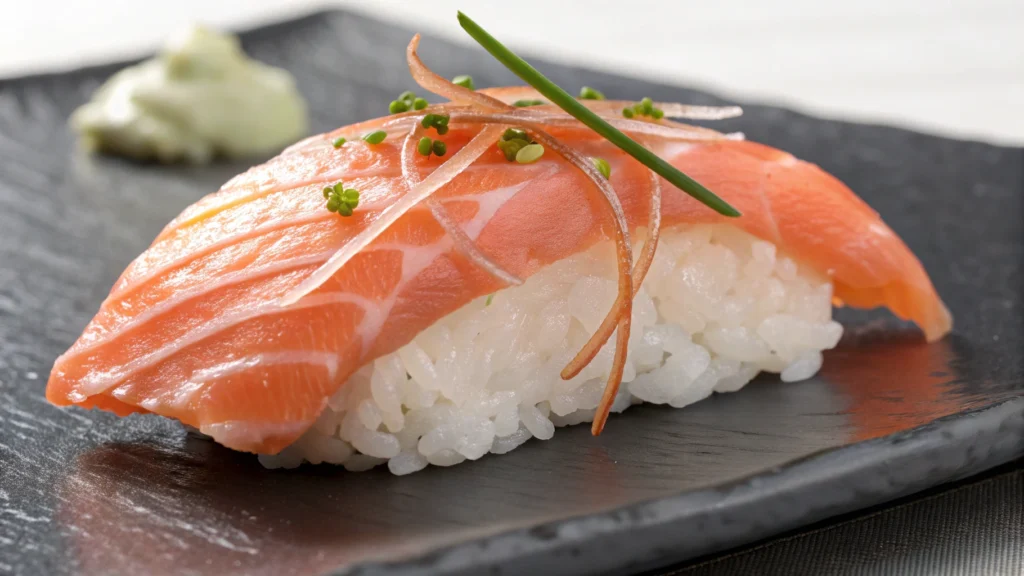
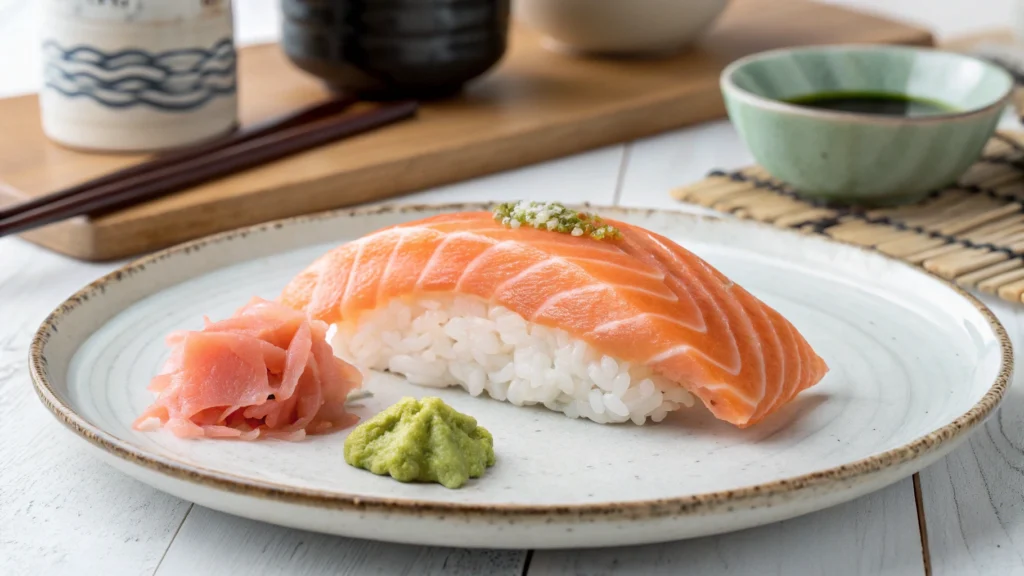
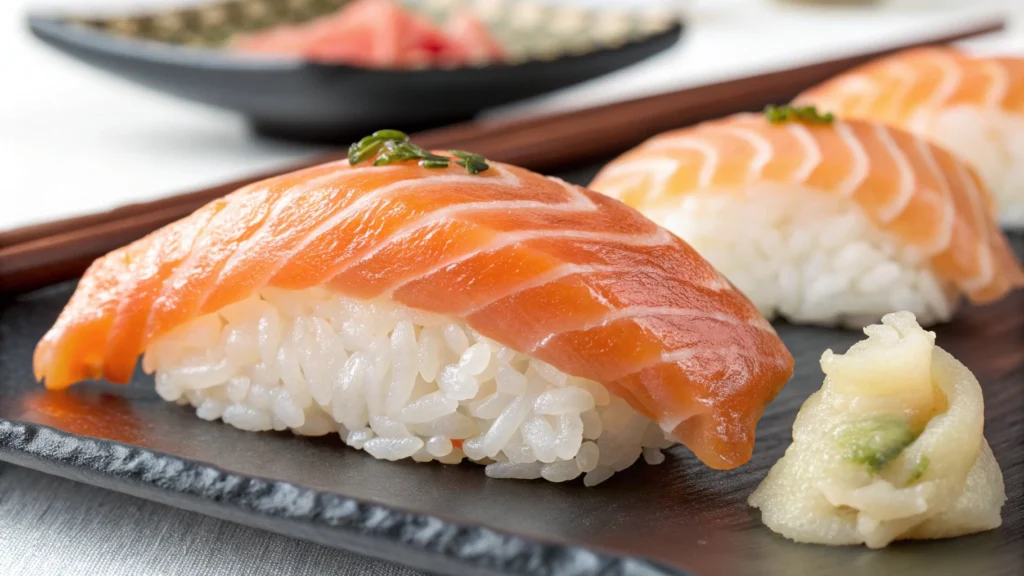
Salmon nigiri is a classic type of sushi that consists of a hand-pressed oval mound of sushi rice topped with a slice of fresh salmon. Unlike sushi rolls, nigiri focuses on the simplicity of two main ingredients: rice and fish.It is commonly paired with soy sauce, wasabi, and pickled ginger.
Nigiri vs. Sashimi vs. Sushi Rolls:
- Nigiri: Hand-pressed rice topped with fish.
- Sashimi: Delicately sliced raw fish served on its own, without rice.
- Sushi Rolls: Fish and other ingredients wrapped in seaweed and rice.
Ingredients You’ll Need for Salmon Nigiri
Essential Ingredients:
- Sushi-quality salmon: Opt for fresh, high-grade salmon labeled “sushi-grade” for safety and best taste.
- Sushi rice: Short-grain Japanese rice, known for its sticky texture.
- Rice vinegar, sugar, and salt: These ingredients season the rice and give it an authentic sushi flavor.
- Wasabi (optional): Adds a slight heat between the rice and fish.
- Soy sauce and pickled ginger: Traditional accompaniments for serving.
Equipment Needed:
- Sharp knife: Essential for slicing salmon precisely.
- Rice paddle: Helps mix and shape the rice without crushing it.
- Bamboo mat (optional): Not required for nigiri but useful for sushi rolls.
How to Make Salmon Nigiri – Step-by-Step Guide
Step 1 – Preparing the Sushi Rice
- Rinse the rice: Wash it under cold water until the water runs clear.
- Cook the rice: Use a rice cooker or stovetop method to cook the rice according to package instructions.
- Season the rice: Mix rice vinegar, sugar, and salt, then fold it into the cooked rice.
- Let it cool: Allow the rice to reach room temperature before shaping.
Step 2 – Slicing the Salmon
- Use a sharp knife: A dull knife will tear the fish instead of cutting clean slices.
- Cut at an angle: Slice the salmon at a slight angle to create thin, uniform pieces.
- Ideal thickness: Each piece should be about 2-3 inches long and 1/4 inch thick.
Step 3 – Shaping the Rice Balls
- Wet your hands: Prevent rice from sticking by keeping your hands damp.
- Form small ovals: Take a small amount of rice (about the size of a ping pong ball) and gently shape it.
- Apply the right pressure: The rice should be firm enough to hold its shape but not overly compacted.
Step 4 – Assembling the Nigiri
- Add wasabi (optional): Spread a small amount on the salmon slice.
- Place the salmon on the rice: Lay the fish over the rice and press gently.
- Shape the nigiri: Lightly press the edges to secure the salmon in place.
Step 5 – Serving and Presentation
- Arrange neatly: Place the nigiri on a clean plate in a row.
- Garnish: Add sesame seeds, microgreens, or thinly sliced scallions for a professional touch.
- Pair with condiments: Serve with soy sauce, pickled ginger, and wasabi.
Tips for Perfect Salmon Nigiri
- Choose fresh, sushi-grade salmon: This is crucial for both flavor and safety.
- Use slightly warm rice: Cold rice won’t hold together well, while hot rice can make the fish lose its freshness.
- Don’t overwork the rice: Light handling keeps the texture airy and authentic.
- Keep a clean workspace: Having all your tools ready makes the process smoother.
Serving Suggestions – What to Pair with Salmon Nigiri?
- Miso Soup: A warm, umami-rich soup that complements sushi perfectly.
- Edamame: Lightly salted soybeans for a simple, healthy side.
- Seaweed Salad: Adds a refreshing, tangy contrast to the richness of salmon.
- Japanese Green Tea or Sake: Traditional drink pairings to enhance the meal.
Frequently Asked Questions (FAQ)
Can I Use Frozen Salmon for Nigiri?
Yes, but it must be sushi-grade and properly thawed. Freeze salmon for at least 24 hours to kill potential parasites before using it for raw consumption.
How Do I Know if My Salmon is Sushi-Grade?
Look for labels specifying sushi-grade or ask your fishmonger. Sushi-grade fish is flash-frozen at low temperatures to kill bacteria and parasites.
Can I Make Salmon Nigiri Ahead of Time?
It’s best enjoyed fresh. However, you can prepare sushi rice in advance and store it at room temperature, then assemble the nigiri right before serving.
What’s the Difference Between Salmon Nigiri and Sushi Rolls?
Nigiri consists of hand-pressed rice topped with fish, while sushi rolls (maki) include seaweed and additional fillings rolled together.
Conclusion
Making salmon nigiri at home is an exciting and rewarding experience. With high-quality ingredients, a little practice, and the right techniques, you can create delicious, restaurant-style nigiri in your own kitchen. Whether you’re making it for yourself or impressing guests, this simple yet elegant sushi dish is sure to be a hit.
Have you given our recipe a try?
There are no reviews yet. Be the first one to write one.